Making a New Set of Morgan Spring Gaiters
A Friend of ours has just acquired a lovely Red Morgan Roadster and, being a fan myself of 'Gaiters' used to cover both the Upper and Lower Springs of the Sliding Pillar Suspension myself, I offered to make a set for him.

The Morgan Car Front Sliding Pillar behind its Damper
The Two Springs on the Sliding Pillar are Both delivered exposed to all of the road water, dirt and grit that bad weather can cause to splash up.

A Hub Assembly waiting for its Springs to be added.

The Bottom Spring (Bump Spring) is the most vulnerable as the Central King Pin, set inside it, is also totally exposed.
The Upper King Pin is partially protected by a Metal Sleeve set inside the Top Spring.

This new Suplex Sliding Pillar System is becoming popular as it gives the Morgan a Softer Ride.
I am sure that many Morgan Owners do not realise that road grit and other dirt is going to find its way into the Phosphor Bronze Bushes.
This Grit will wear them away if they are not protected, requiring early replacements of the King Pin and the Bushes.
As the Morgan Factory does not offer Gaiters of any type to be fitted, even though the early Three Wheeler Cars were given Metal Gaiters covering both of their springs.
The set of 4 Phosphor Bronze Bushes and 2 King Pins can be clearly seen in this photo below along with Upper Spring Collars (and 2 tools).
Modern King Pins are made from Hardened Stainless Steel and there are Bushes made from a Highly Durably 'Plastic?' substance available.
However, they all need protecting.

Being a member of The Talk Morgan Forum, I met there the 'Roadster Guru' DaveW (Wellings) at the Centenary Gathering.
It was Dave who first offered me, for sale, a set of Lower Bump Spring Gaiters which were fitted to our first Morgan 4/4 but were left on it when sold.
These were made by Dave's wife from Mohair Car Hood Fabric.

Bump Spring Gaiters, fitted to the Morgan.

The Bump Spring with the Gaiter removed.
In the photo above, with the Gaiter removed, it is clear to see that the grease covering the King Pin is free from Road Dirt.
On a car without Gaiters, this would be a mass of dry and grit filled grease.

An exposed and grit covered Bump Spring.
When New Grease is added, some of the old grease is pushed out below and above the bushes and has to be wiped away to avoid any getting onto the Brake Discs.
With Gaiters fitted, most of this excess grease is held inside and only needs an annual clean up when the Wheels are off for cleaning and the Gaiters may be easily removed.
Being of the Clothing Industry during my career, It would have been remiss of me not to have a go a making a set myself, which I did for our New Roadster 100.
These were fitted when the car was new before any muck could get at the suspension.

The inside of one of my early Lower Bump Spring Gaiters
I made my first set using some discarded heavy waterproof Polyester fabric recovered from an old Waxed Jacket.
As may be seen above, with the many spring compression's received it was not really stiff enough.
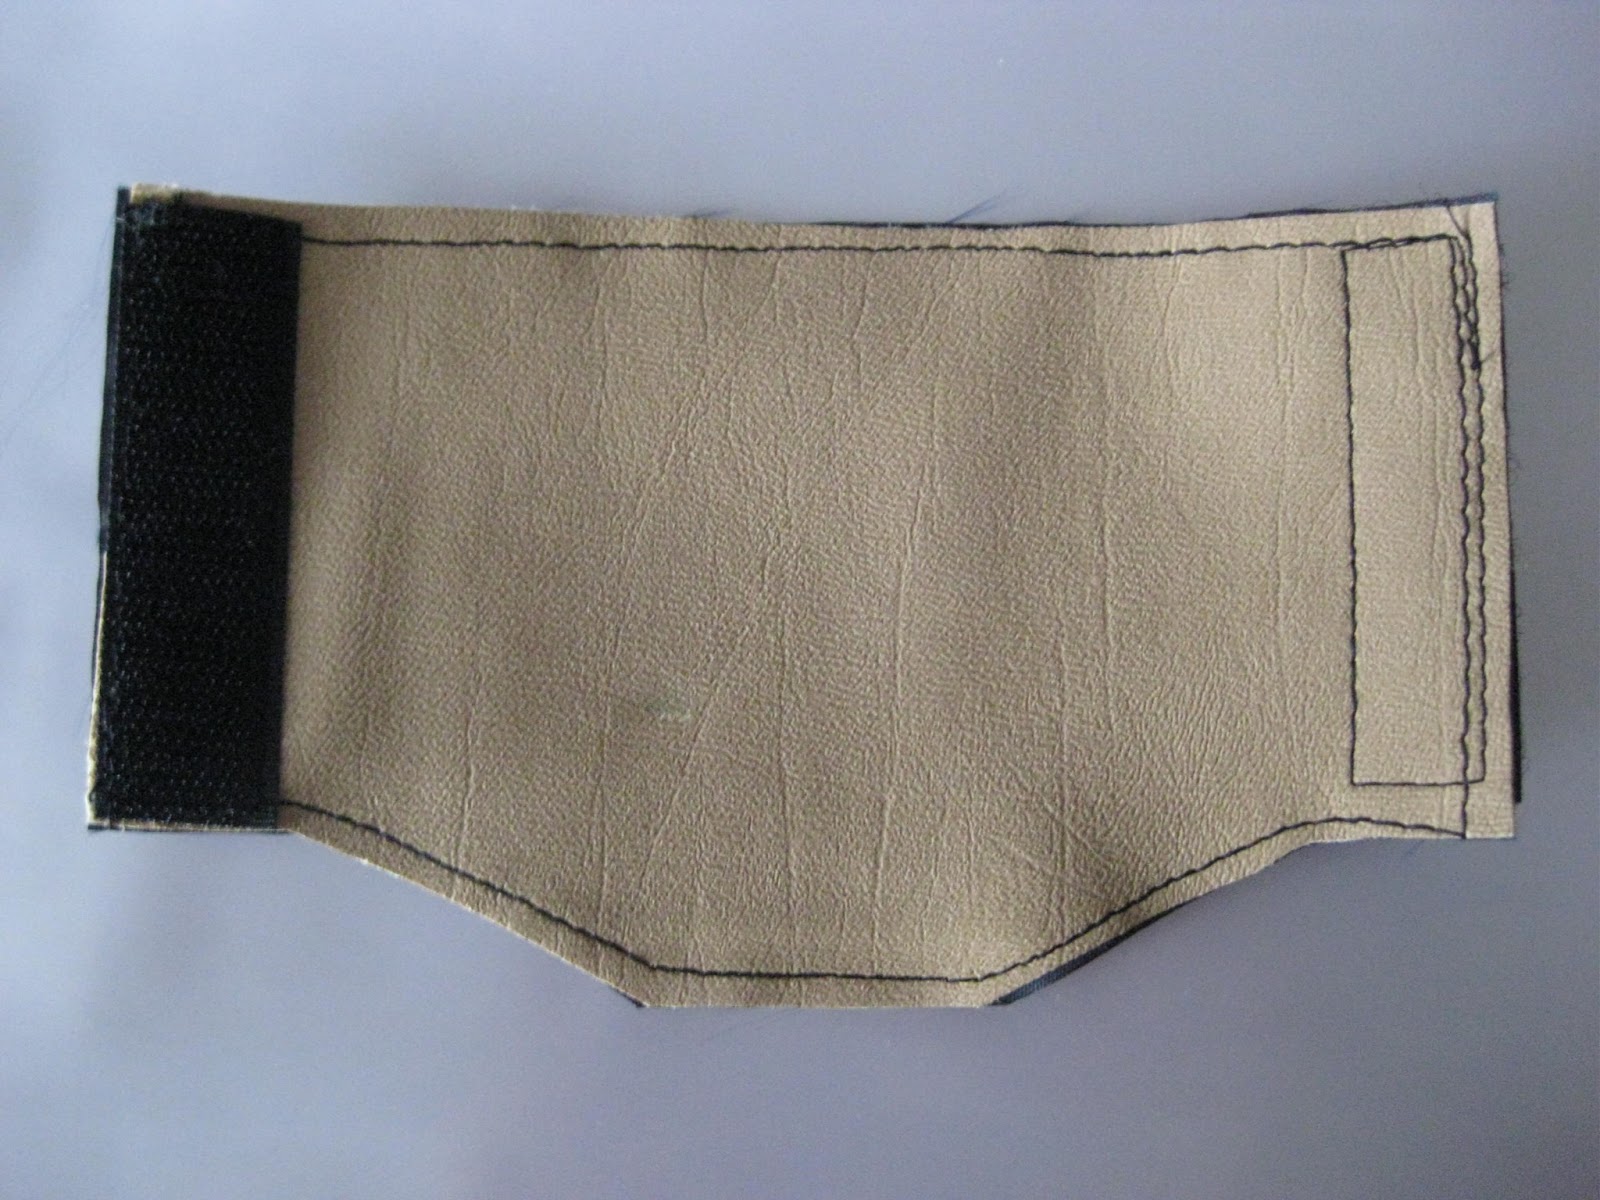
My next attempt used an inner liner of Simulated Leather and these are still on my car after over a year.
The wrap over faces the rear on each side when fitted.
The Inside View
As you can see here above, the construction is simple with the piece shaped to fit around the lower Cross Member Bracket and the addition of each half of a strip of 'Non Adhesive' Velcro to each edge.
(Non Adhesive Velcro avoids gummed up sewing machine needles that you will get if you use adhesive backed Velcro).
Below is a copy of the diagram.


This New Set is made from a single ply of Heavy Duty Waterproofed Fabric taken from an old Lap Top Computer Bag.
Some people fit Rubber Motorcycle Gaiters when they replace the King Pins but these are not removable to clean out the old grease annually, as can be seen in this link to the Morganatica website.
My own Gaiter Article may be seen there as well.
So, What about the Upper Gaiters?
I have been told that adding Upper Gaiters is a waste of time!
I come from the 'I'd rather be safe than Sorry' school of thinking so set out to design my version.

Dirt, in and around an upper spring.
Some people recommend a simple 'one piece' wrap around with a solid strip of Velcro as shown on the GoMog website below..

Here is a set of my finished Gaiters.
Thinking about the Upper Springs and the amount of Compression they receive, I decided to design a method where the Gaiter could flex.
The Velcro would remain fastened and the Gaiter not end up sliding to one end of the spring.
Springs Compress from the Middle, so my Gaiters have a waist Belt to hold it there allowing the upper and lower sections to come to it.
After over three years the theory seems to work as the original set is still functioning and continue in place.
The waist straps are recovered from the many Airline Bag Tags I collected during my business life. I knew they would come in handy for something.
The Square of fabric is given Turned Over Edges to help stiffen the Gaiter to help its compression recovery.
The Velcro is cut into 5 x 2cm squares leaving a 2cm gap to allow for compression.
There is an extra wide 2,5cm wrap over flap to help keep any moisture out and, as with the Lower Gaiter, the wrap over is set towards the rear of the car when fitted.

The Upper Spring Gaiter in place.

The Outer View of an Upper Spring Gaiter showing the Five Velcro Pads

The Inside View showing the Turned Over Edges for adding extra Stiffness and the square Velcro Hook patches inside.

The Design Drawing is more complex showing the extra wrap over flap on the left.

Now that the set for my friend are made, I must contact him and arrange to meet and fit them onto his Roadster.
Happy 'Soft Suspension' Morgan Motoring
Frank
P.S.
I was searching for something else today and came across these Fitting Instructions I prepared for Williams Morgan who were fitting a set I had made for another friend.
Morgan Front Suspension Gaiters Sets – Fitting Instructions
Lower Bump Spring Gaiters.
The Lower Gaiters are made to only fit one specific side of the car .
They are marked accordingly on the inside with :-
“Top” -
“Offside” or “Nearside” -
“Toward Rear” (on the Top Wrap ends)
The Gaiters are shaped to fit easily inside the ends of the X Frame Lugs.
The Velcro Wrap Over should be located on the Inboard Side and with the Top Wrap facing to the Rear of the car.
If fitted correctly this should prevent ingress of wheel thrown contaminants.
Upper Spring Gaiters.
The Upper Gaiters fit either side of the car.
Again, the Wrap Over is best kept on the Inboard side of the Spring with the Open Edge facing towards the Rear of the Car.
The Velcro Patches and the Deeper Wrap are designed to allow the Gaiter to compress without opening the Velcro.
The Waist Strap is there to ensure that the Gaiter compresses from each end along with the spring.
The Strap needs to be tight making it possibly necessary to add an extra hole in the strap for each spring.
Frank Lomax - The Morgan Centenary Roadster 100 Register
Since fitting the Gaiter Set to my friends 1996 Series 1 Roadster I discovered that the Top Springs on his car are Fatter and Longer than the Springs on either my 2007 4/4 or on my 2009 Roadster 100.
Also his Bump Springs are Slightly Thinner than mine are.
- This is not a problem as the wrap on the Gaiter was was just increased when fitted.
However, while the Upper Spring Gaiters just about fitted, they did not have enough wrap are now being re made both 5/8in Longer and 1/2in Fatter than my own gaiters.
Following the drawing above for my car, the finished dimensions for his car will now be 8in High and 9,1/2in Wide.
The Velcro Pieces will also be spaced slightly wider but will be the same distance from the open edges, as will the Leather Straps.
For those of you who intend to follow either of these Gaiter Designs it will be worth getting down and under your car with a Tape Measure (as I did originally) and take your own finished measurements before making your patterns.
..........................................................................................
A New Development.
Since writing this Blog Page I have come across the very informative YouTube Video ( Link below) which, about 1.5 minutes in, clearly shows that when the Upper Spring is under extreme compression during driving, then the Sliding Pillar actually appears to lift high above the Bump Spring leaving exposed King Pin.
It is clear that the original Bump Spring Gaiter is going to be 'too short' during these driving conditions and could allow some detritus to enter over the top of it.
Therefore, I now need to produce a much longer (+ 1in ) version of the DaveW design, using the same spaced Velcro system as the upper gaiter and to then compress it to fit it into the stationary Bump Spring Gap so that it can expand that 1in as the upper spring compresses.
Best Wishes
Frank & The Green Goddess.


No comments:
Post a Comment