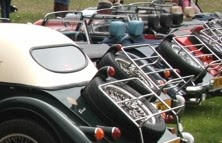
A Practical Hood Stay for the Roadster 100
by David Owens
How many times have you wished you had two pairs of hands when you want to put or remove items on the rear shelf by lifting the rear of the hood?
This simple method was developed by a member of Talk Morgan.
The Talk Morgan Version
It is not difficult to make and is an improvement worth doing.
I have also tried it with the Hood folded in the down position and it holds easily.
I have the same issue with the Hood fouling the headrests in the alternate Half Toneau Hood Folding scenario. It is harder to lift up far enough to latch the stay with this folding method and position.
I have tweaked it
a little to come up with the version I made and fitted to Car No. 046.
Materials
1 Piece of 10mm
Aluminium Bar – I used 10mm Thick X 25mm Wide and 100mm
long. (Purchased off the favorite auction site... www.ebay.co.uk/usr/ukdirectmetals )
1 Piece of 6mm
Aluminium Bar – I used 6mm Thick X 20mm Wide and 200mm long.
(Purchased off the favorite auction site as above)
1 Piece of 3mm
Aluminium Bar – I used 3mm Thick X 10mm Wide and 25mm long.
1off - M6 x 30mm Stainless
Countersunk Bolt.
2off - M6 Nylon washers.
1off - Small woodscrew.
Thread Lock Liquid
Tools Required
Vice
Hacksaw
File
Wet & Dry Sandpaper
Solvol Autosol Metal Polish
6.5mm drill
10.5mm countersink
drill
3mm drill
Construction Method
1. Starting Point - Cut the 6mm bar to 103mm for the Pivoting Stay.
- Cut the 10mm bar to 35mm for the Short Lug.
2. Cut and shape the bars to the dimensions shown.
Use wet and dry paper
to remove any marks created by holding the material in the vice and
to prepare the metal for polishing.
I used a Dremel with a buffing pad to speed up polishing but it is not a necessity.
After all are prepared
and polished you are ready to put the three pieces onto the car.

Completed Parts 1 and Part 2 with Screws and 2off Nylon Washers.
Assembly Steps 1. 2. & 3.
(1) - Remove two existing screws from the hood frame and the hood bracket attaching the hood to the body.
(2) Use the bolt from the Hood Frame to attach Part 1, the 10mm thick Fixed Lug piece, to position 1.
Tighten this up lightly as you will need to move it to get the correct angle for locating part 2.
The Fixed Position Lug - Piece 1 - Attached.
(3) Use the M6 30mm bolt and two nylon washers to attach Support Arm - Part 2.
The two washers go between the hood bracket and Part 2.
One washer fills the original countersunk hole in the existing hood bracket and the second acts as a spacer for Part 2.
Tighten up lightly so that you can move the stay.
The Pivoting Support Arm - Piece 2 - Attached.
First Trial Fitting of Both Fixed Lug and Support Stay.
Lift the rear of the
hood up until you can swing the hood stay into position to fit into
Part 1. Adjust until it fits together snugly. Then tighten up Part 1
to the hood frame.
Fitting Hood Support Stay - Part 3.
For the support bracket - part number 3 - drill a 3mm pilot hole and bend to 90% at 15mm from the top edge.
You may have to enlarge this hole slightly for the woodscrew you have chosen.

The Hood Stay Support Bracket - Piece 3.
Position the small angle bracket Part 3 in a chosen location to catch and support the hood stay when not in use.
You will need to pilot drill of the correct size into the Wood Frame to allow the bracket to screw on easily.
Please Remember that the Ash Wood Grain is dense and the last thing you want is to sheer off the wood screw while tightening.
The Support Bracket - Positioned to Support The Hood StayCompletion.
When you are happy with
the fit remove just the Hood Stay Bolt and apply some ThreadLock liquid to the threads
and reassemble.
This should prevent the bolt from coming loose due to
repeated rotation of the Hood Stay during operations.
The finished article.
No more holding up the hood to pack or unload the rear shelf.
David Owens.Caveat Emptor. - The amount of lift may be raised by extending the length of the Support Stay (piece 2).
However - care must be taken as making the stay too long could cause the heavy folded hood to tip over into the passenger bay hitting any passenger still sitting in there.
..................................................