Dave Wellings Roadster Front Valance
On 30th August 2008 I picked up my Roadster.
I've learned quite a lot in the nine years which have followed.
I didn't like the open front aspect of the Trad (still don't), but back then I wouldn't have contemplated bending aluminium of the required size.
So as some of you will know, I adapted an MGB spoiler to fit the front, and this, with a flat aluminium tray between the over-rider brackets, has served me well.

In 2013 when we bought Mr Bumble, I still lacked the confidence to make a one piece valance, but managed a short valance which attached to the flat tray between the over-rider brackets.
It wasn't until 2016 and The Plus 4 that I got stuck in with a full length valance, which turned out well. And so this became my next Roadster job.
Starting with a sheet of aluminium.
The Roadster over-rider brackets are fitted with the horizontal ledges facing inwards, unlike Tigger where they face outwards, so immediately the two valances are different.

1.5mm is the maximum I can bend into a curve.
Even then it can easily dog-leg into an irregular bend which then has to be filed.
For the threshold I think 1.2mm would work well enough.
It could be padded behind with camping mat if necessary.
You also need a strong former over which to bend.
I've used my large jack handle and for this job I happened to have two really stiff cardboard tubes, which were perfect.
Once I used the clothes post in the garden.............
A drain pipe would also work.
When my bench vice and timber offcuts don't do the job, I sometimes slot the piece between two of the timbers which cover the pit, and use wedges in the adjacent slot to hold tight.
I've tried heat in the past but I could never get it hot enough with my blowlamp to make any difference.
Roger - 2006 4/4 Duratec say's - This is the last one I bashed out in the garage.
Made from 2mm sheet and really strong. Had to make a wooden former first.

Before I got this far, here's the radiator, which needed a good clean.

After cleaning, and with a light blow over of satin black.
I also couldn't resist adding a cosmetic carbon fibre trim over the bottom panel.
Note the Rivnuts which attach the grille.
I refit the setscrews from behind for convenience and here they are wound in.
They are much longer than this. Newer Morgans don't have Rivnuts.
They have simple holes drilled in this panel. The holes may be enlarged to get a good fit to the grille.

Neil asked how I get my Number Plate Box more vertical.
This is how. Not very elegant but effective.

This is the beginning of the bending...............

And the first test fit..........

This is one of the side panels.
Because they are small, they bend easily and uniformly.

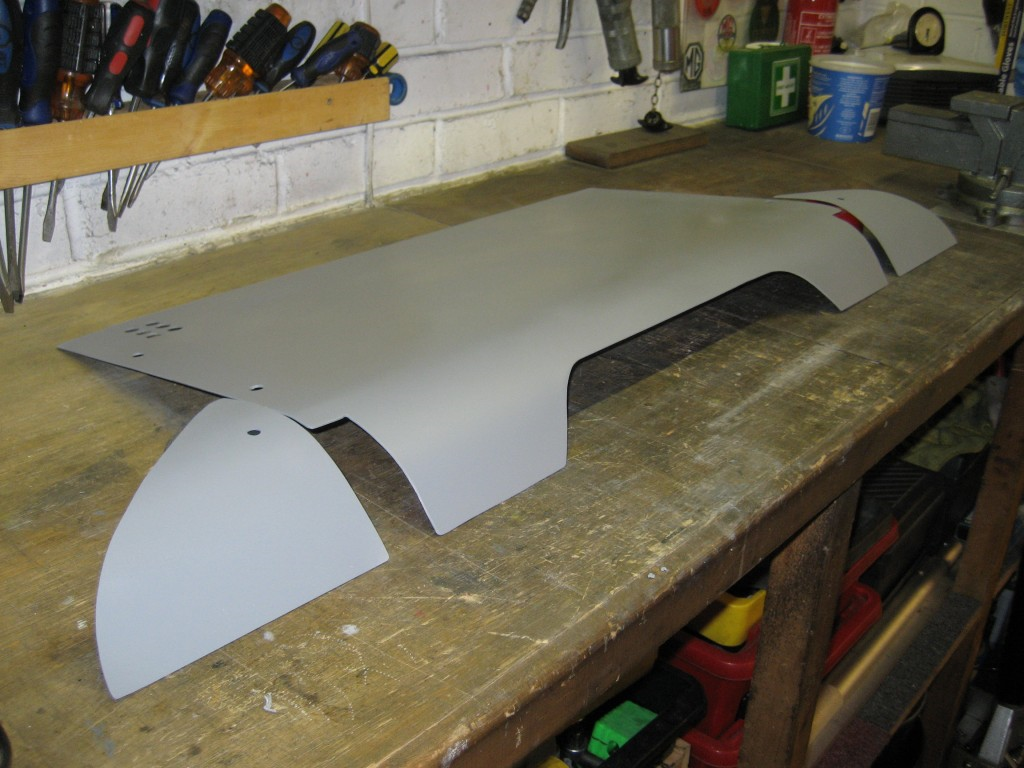
Here are the side panels, shaped and drilled.

And here's the main valance, shaped and drilled.
The six holes in the top left corner are to allow air to get in to reach a sensor which is located on the lower cross tube.


This was the end of day 1.
About four hours work.
More to follow........................
The next day was a test fit of the neoprene edging.


Bespoke brackets were needed for the end pieces.
Starting with cardboard, and finishing with these.

This is how they fit, using existing holes.

Porsche Signal Orange from the seventies was on my short list of two colours for Tigger.
I didn't have the guts to go for it, but I did have an aerosol can, So I used it for the first two coats, just to see....................
I must admit to feeling a twinge of regret.
It looks fantastic.

This is the start of the top coating..............


Flatted off...........


Finally with lacquer. Painting at home isn't easy.
Sometimes it's two paces forward and five back, and red is much harder to get right than yellow.
But in the end, it's acceptable, but certainly not professional standard!

Now with neoprene edging added...........

More to follow..................
This is how it looks with the number plate box removed and no under tray.

This is how it is cut around the over-rider brackets.


Now with number plate box added.


And that's it!
Quite a few days work.
The shaping went really well, but the paint was a real problem to get right this time, but where do you stop re-doing it!!!!!
Although this may be beyond the ability of some owners, there are metal benders out there who could easily make one of these trays, but would need your car for the fitting.
Although this may be beyond the ability of some owners, there are metal benders out there who could easily make one of these trays, but would need your car for the fitting.
And it could be sprayed professionally.
But the two I've made are completely different, and so can't be interchanged.

No comments:
Post a Comment