Why fit a Lower Valance you may ask.
My Original Morgan Radiator, which has a Plastic Body and Connection Lugs, sheared its lower pipe connection, a problem proving to be quite common to these radiators. It sheared just as I arrived at the Dealership on the day that it was due to have its Annual Service and MOT Test.
Rather than replace the Radiator with another original plastic one I decided to invest in an Aluminium Radiator made by Aftersales Specialist Peter Mulberry, ( Mulfab).
The Mulfab Radiator is larger and deeper than the original Morgan version providing a for more efficient cooling. It does however, hang down lower below the Front End than the original one did before
Initially I had sprayed the lower edge box part of the Radiator but despite dulling the bright finish, the lower edge was still obvious. It needed a Valance of some sort to cover it.
The Mulfab Radiator Base.
I purchased this Lower Valance when I heard that another Roadster 100 Register Member was having both an Aluminium Radiator and a Lower Valance fitted to his car at Williams Morgan.
The Williams Lower Valance in place.
My Valance arrived some months later but I first needed to build a Workbench in my newly refurbished Garage before I started the job.
This Work bench was completed on Friday so I set to and stripped off the Number Plate and removed the Grill to find out where to go next.
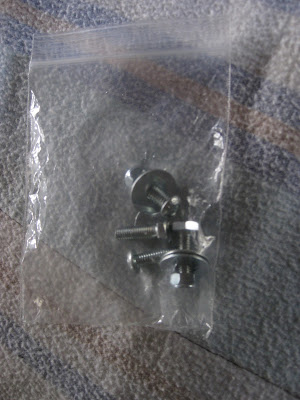
Unfortunately the delivered Valance only came with a Bag of Six Bolts with Nuts and Washers and Two Strips of Aluminium Bar with a hole drilled in one end of each one.
The New Valance
One of the Aluminium Bars
And So the Mystery began.
Under the Front End there are Two Bolts protruding inwards which hold the lover ends of the Radiator Cowl to the Chassis. These two Cross Head bolts are the same size as two of the new bolts supplied.
There was sufficient excess thread to carry both the Cowl, the Valance and its inside and outside washers and nut without needing to remove the existing nut & bolt.
The Two Slotted Holes already in my New Valance obviously should have lined up with these bolt ends but, being on a Hand Built Morgan, needless to say, the Slots were slightly too far apart.
I set too using one of my small Tapered Grindstones and soon the slots were rounded to provide the very width that I needed.
The Rounded Hole
(with lots of messy transfer of chassis Wax Oil from my hands.)
However, The Valance still would not fit. I then realised that the Twin Horns, which are located below the Chassis Radiator Opening, were also in the way.
After some Head Scratching, I realised that the Horns would have to be removed or repositioned.
With some redirecting of the Power Cables, the Two Horns are now located above the Chassis inside the Radiator Box and behind the Grill rather than behind the Number Plate.
Rather than have the Horns facing forward as before, allowing water to run down inside, I have turned them sideways. I also wrapped the Cables with Black Insulating Tape to tidy the appearance.
The Twin Horns now set above the Chassis
At this point in the proceedings I spent quite a while under the car with my inspection lamp wondering where these two pieces of Aluminium Bar would be used and what they would fit to as there were no more holes in the New Valance and only one hole in each aluminium bar.
I needed to sleep on this one. I had thought of emailing our member to ask him for some photos of his installation. I even thought of contacting Williams.
This morning I took another look under and realised that there were now two threaded bolts hanging down from the Chassis - Under the Two Horns!
Suddenly realisation took place as these could be the location for one end of the Aluminium Bars. Again the exposed Threaded Horn Bolts would be long enough to take the 2.5mm thick Aluminium Bar, Locking Washers and Nuts.
I cut a Card Template exactly the same size as one of the Aluminium Bars and Temporarily fitted the Valance again onto its two existing bolt ends.
Working back from the Lower ends of the Horn Bolts I folded two angles into the Card Strip. The Top End is to the left.
My Card Template with Folds and Hole Positions Marked.
The two Horn Bolt Ends are set 15cm apart. All I now needed to do was drill Two Extra Holes in the Bars sized to Fit the Horn Bolts and then to drill Two Extra Holes 15cm apart in the Upturned inner edge of the Cowl.
Two Holes Drilled in The Cowl Upturn
(Masking Tape used to protect the Paintwork)
The Next Task was to bend the Aluminium Bars to the same shape as my Card Template. I needed the use of my New Vice on my New Bench to complete this task efficiently.
First Bend Completed
Both Bends Completed
Compared to the Card Template
Before Fitting the Valance permanently to the Body Bolts I first needed to fit these Brackets to the Horn Bolts permanently.
The Completed Brackets fitted to the Horn Bolts
One of the Brackets - and my Painted Radiator Base
Now the Valance has to be permanently fitted to their existing Bolt Ends. But first I would polish off all of those greasy Wax Oil finger marks.
I decided not to use the New Cross Head Bolts supplied with the Valance as to replace the whole bolt could prove very difficult and it was not essential as there was enough exposed thread on the existing Bolt to carry the Valance and the Nut & Washers.
I would use the Two Large Washers supplied, one inside and one outside, and the Self Locking Nuts, one on each side
The Attached Valance on the Existing Cross Head Bolt End.
This photo appears strange due to the reflections inside of the Valance.
It shows where I have attached the New 10mm Bolts and their pair of Washers between the lower end of the Aluminium Brackets and the Upturn provided on the New Valance, where I drilled the two new holes.
This is the Upturn showing one of the 10mm Bolt Heads and the Outside Washer.
This one shows the Upper end of the Brackets and one of the other fixing points.
After a bit of a struggle to get the Grill back into its slot and onto the Bolt Pegs, The Badge Bar and the Number Plate Box are both back in place.
Now I just have to find that 'safe place' where I put the Number Plate Screws.
Number Plate Back On the Car - Job Done!
The Full Valance, photo taken from Lower Down.
Then a Squirt of Wax Oil on the new Nuts and Bolts to complete this task.
For Next Time. I also bought as set of Williams Morgan's Reactions Brake Reaction Rods with the Cowl, so I need to set about Planning to fix those in place but could prove a little more challenging for me.
Frank.
……………………………………………………..
On removal from the car it is clear that the Nearside Corner also has an extended crack and is about to go the same way.
The visible crack forming on the Nearside corner.
A pair of handy Steel Corner Brackets from my Scraps Box are folded over each of the damaged corners
The folded in edges are trapping the broken corners in place
The final drilled and Pop Rivetted Brackets ready for re fitting to the car.
The inner ends of the Pop Rivets splayed over the edge of the oversized inner holes
Refitted onto the car on their Location Bolts
Lastly, Blocks of 1/2in Neoprene cushions inserted behind each of the angled support brackets to try and reduce any further vibration effect.
……………………………………………………..
All is not well it seems?
It was during a recent warm up run that I noticed the constant rattling coming from somewhere on the car.
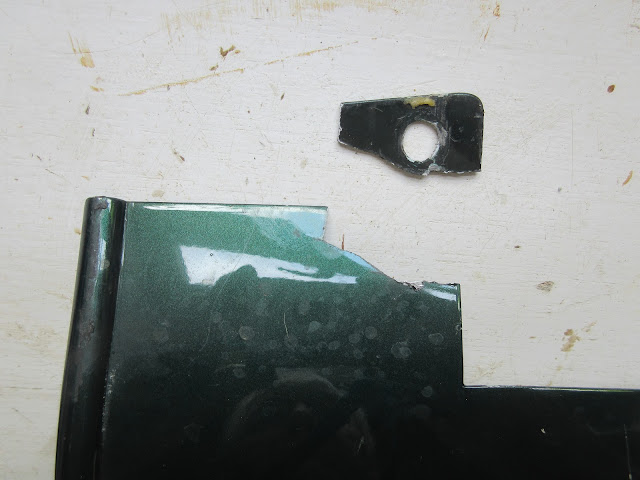
It took a while to locate the culprit area when I noticed that the Front Valence had parted company on the offside.
Vibration must have caused metal fatigue in the aluminium allowing this corner to shear off where it bolts to the lower end of the Grill Cowl.
On removal from the car it is clear that the Nearside Corner also has an extended crack and is about to go the same way.
The visible crack forming on the Nearside corner.
A pair of handy Steel Corner Brackets from my Scraps Box are folded over each of the damaged corners
The folded in edges are trapping the broken corners in place
The inner ends of the Pop Rivets splayed over the edge of the oversized inner holes
Lastly, Blocks of 1/2in Neoprene cushions inserted behind each of the angled support brackets to try and reduce any further vibration effect.


No comments:
Post a Comment